特别提醒:在foxmail上设置时使用的密码,不是普通的网页登录密码
Special reminder: The password used for setting up on Foxmail is not a regular web login password
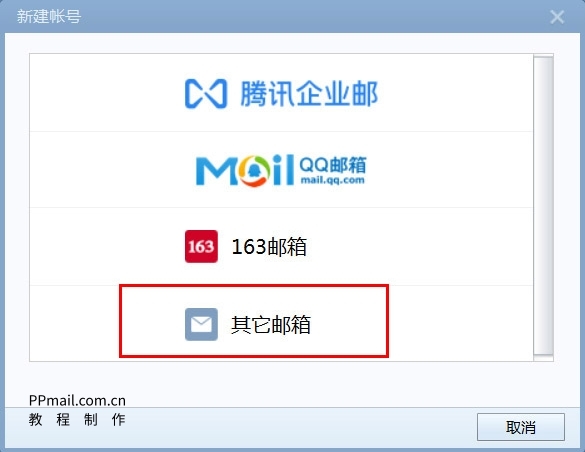
1. 打开Foxmail软件(如果没有安装,可以在品牌邮箱网-邮件客户端下载),选择其它邮箱
Open Foxmail (if not installed, you can download it from the ppmail.com.cn email client) and select another email address

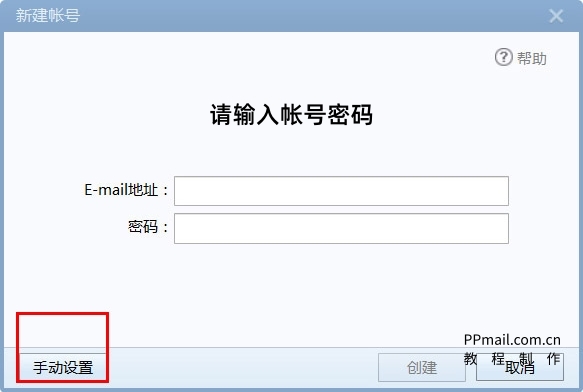
2.手动设置
Manual setting

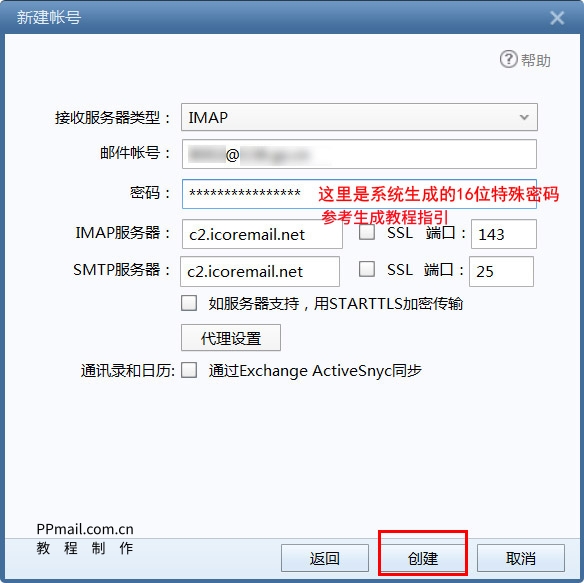
3. 接收服务器类似选择IMAP(查看IMAP与POP的区别),填写邮箱帐号,填写客户端专用密码(点击查看生成教程),
IMAP服务器/接收服务器填写:c2.icoremail.net (不选择SSL,端口号是143;如果选择SSL,端口号是993)
SMTP服务器/发送服务器填写:c2.icoremail.net(不选择SSL,端口号是25;如果选择SSL,端口号是465)
(如果接收服务器选择POP类型,则POP服务器是:c2.icoremail.net,不选择SSL,端口号是110;如果选择SSL,端口号是995)
创建
The receiving server is similar to selecting IMAP (see the difference between IMAP and POP), filling in the email account, and filling in the client specific password (click to view the generated tutorial),
IMAP server/receiving server fill in: c2.icoremail.net (Do not select SSL, port number 143; If SSL is selected, the port number is 993)
SMTP server/sending server fill in: c2.icoremail.net (Do not select SSL, port number is 25; If SSL is selected, the port number is 465)
(If the receiving server selects the POP type, the POP server is: c2.icoremail.net, Do not select SSL, port number is 110; If SSL is selected, the port number is 995)
establish

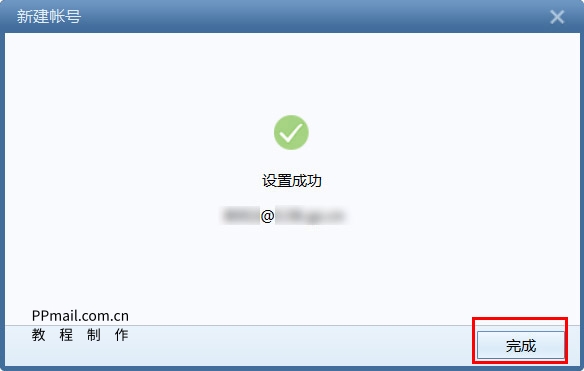
4. 完成,设置成功。
Completed, successfully set up.
